Double the Power: Marketo to Marketo Integration via Zapier
Marketing automation doesn’t only mean setting up email campaign flows (however complex). In today’s post, we share a real-life example of how to integrate two Marketo databases with the use of Zapier.
Scope:
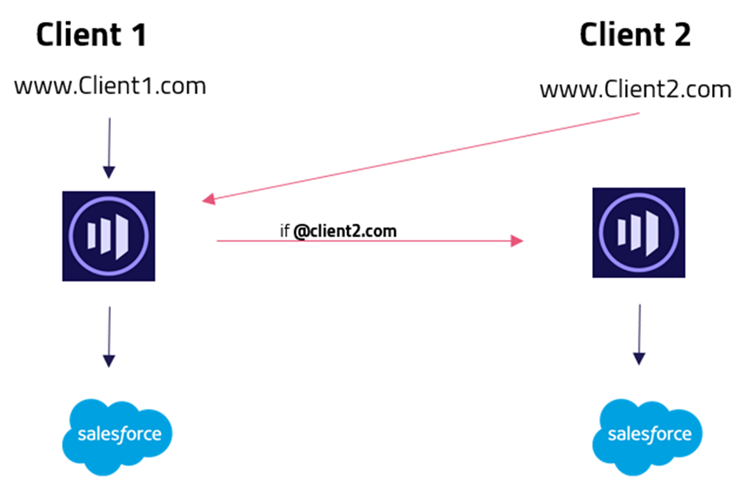
Two companies merged. Let’s call them Client 1 and Client 2.
Client 2’s Marketo data was being merged into Client 1’s Marketo.
Two hand-raise forms set up on Client 2’s domain, were already posting to Client 1’s Marketo.
Before the merge was completed, we still wanted to capture submissions from Client 2’s hand-raise website forms into their SFDC.
Additionally, all submissions that would take place through the same form on Client 1’s landing pages with domain @Client 2.com, should also flow into Client 2’s Marketo. The purpose of this project was to put in place a form and a lead routing solution that – before the websites were merged – had allowed routing of Client 2 records to the Client 1 and Client 2 Marketo and Salesforce.
Sounds tricky, right? You can get a better sense of the requirement by looking at the graphics below*:
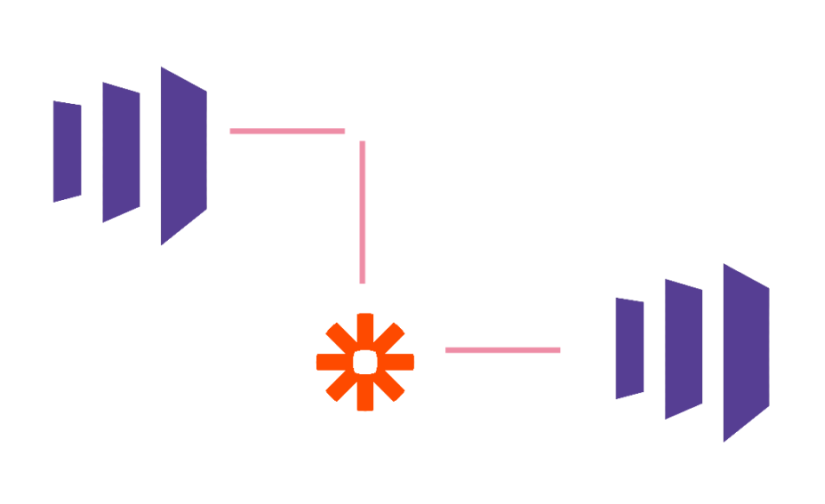
Process Set-up
Here is an example of Zapier flow that managed to achieve the above and push records to Client 2’s Marketo as Form Submission activities, with all the data mapped to the correct set of Person fields.
Client 1 = Marketo#1
Client 2 = Marketo#2
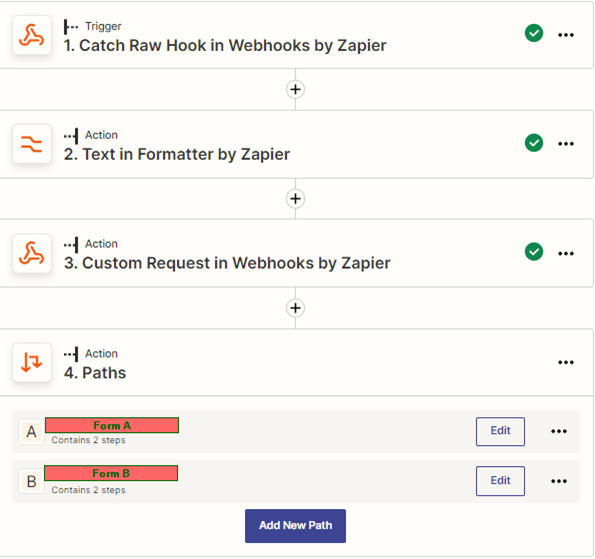
- Trigger that captures webhook, send from Marketo #1 instance
- Set-up for field value standardization “” that broke the .json structure
- GET query that sends a request for Access Token, which is later stored as Zap token
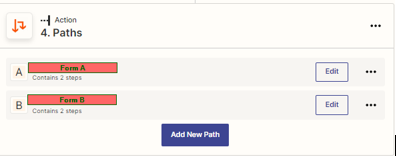
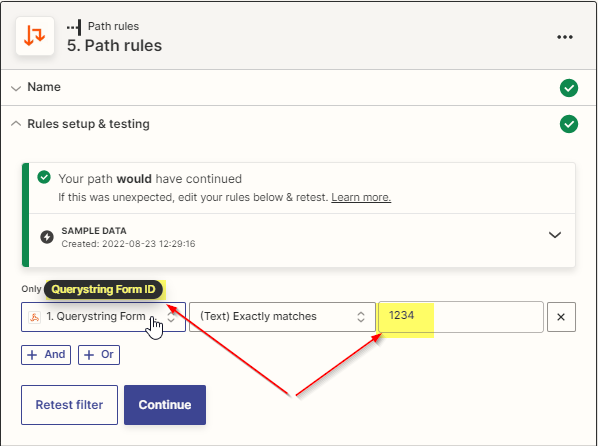
- Paths that should trigger Form A / Form B submission – depending on what was the formID captured in Step 1.
Below is the view of the webhook set-up in Marketo#1, that should push data to the Marketo#2:
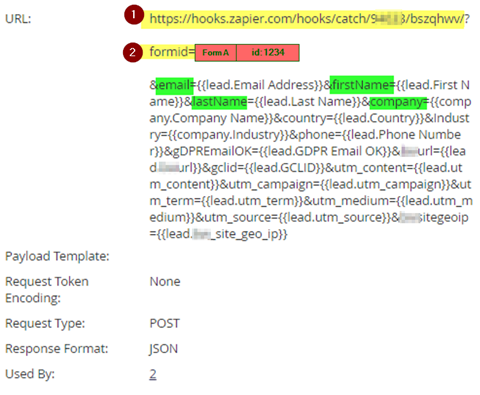
1. A URL generated by Zapier would enable the capture of data sent out from Marketo #1:

2. formid static id value, that later helps to identify which form should be submitted in Marketo#2
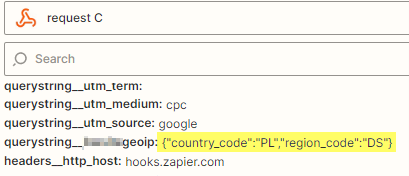
In Zapier flow Step 1, we can see all the data sent by Marketo#1:

Among the captured data, we observed that a specific field contained special characters “” which later in the flow caused errors in our .json code and led to its breaking:
That’s why Zapier step, which clears extra character, was essential:
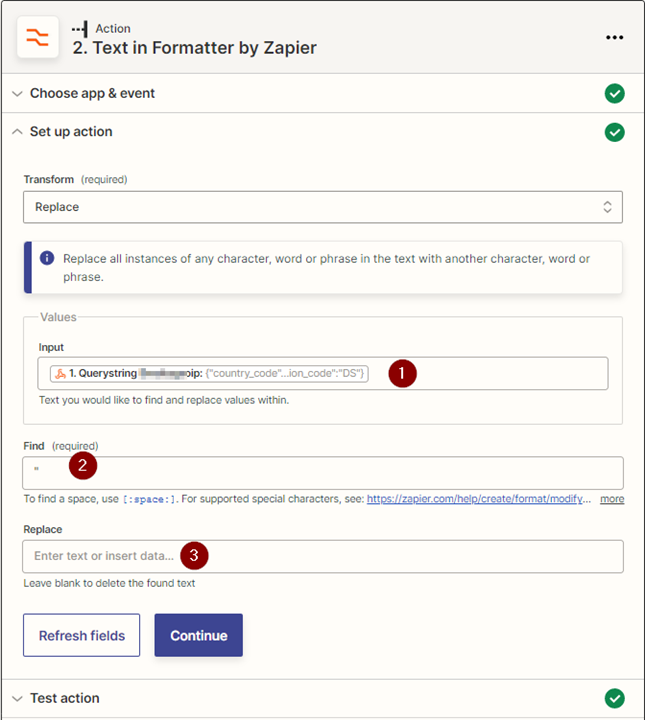
- Input – Field with data to clean
- Find the special character “
- Replace with an empty value
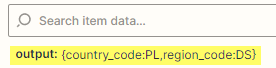
Output:
Having all the data ready for Marketo#2, we must now ask for the permission which is Marketo#2’s access authorization token:
- Method GET to request for token access
- Authorization URL with Marketo#2 ClientSecret and ClientID details:
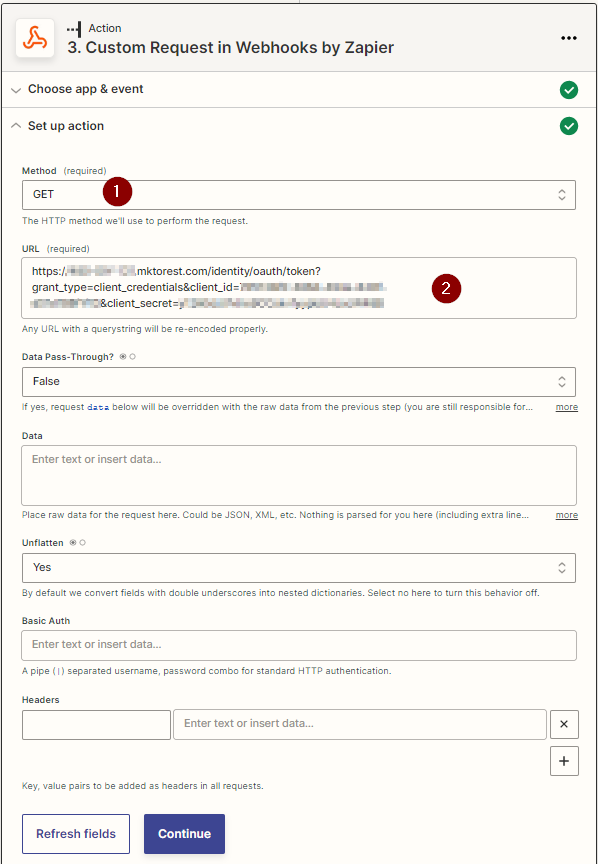
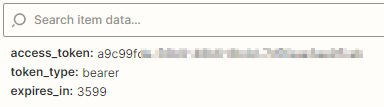
As a response, we receive the authorization token:
Next, we determine which form should be submitted in Marketo#2, based on the formID value from flow Step 1, stored as Zapier token:
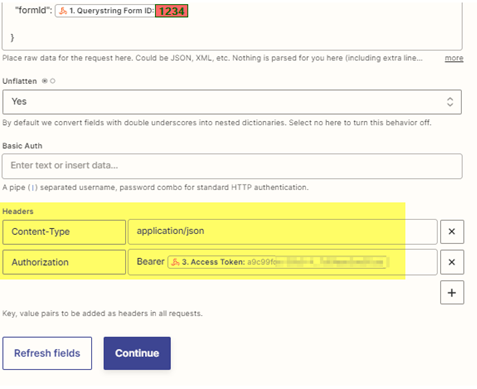
Additionally, we create a .json-type input for the form fields when the form submission action is triggered in Marketo #2.
Below is all the data collected from Marketo#1 in Zap flow Step 1, ready to be pushed to the desired form as fields values in Marketo#2:

Finally, we provide the necessary headers with Authorization token value captured in Step 3:
That’s it!
It’s important to keep in mind that, your Zapier monthly plan has the limit of how many Zaps you can create, so be sure to review how close you are to hitting that limit each month, especially when there are other Zapier automations enabled!
We would be happy to assist you with preparing a set-up similar to the above.
Feel free to reach out to us.